Pinned tabs missing from Chrome? How to create a bookmark folder for pinned pages
I cannot tell you how many times my wife has shouted from one corner of the house or another, “Chrome ate my pinned tabs again!” It seems like no matter how I configure her Chromebook, I know at some point the gremlins hiding away in the OS are always in a state of coming for those tabs.
I’ve done everything possible to keep that from happening, knowing it is inevitable and I’m going to hear that cry again.
I eventually came upon a solution for all that ails my beloved and her oft-frustrating ChromeOS tab situation. On the off-chance those same malicious critters are hiding in your Chromebook ready to take down those carefully pinned tabs, I’ll share it with you.
Ready to avoid that headache?
I’ll be demonstrating on ChromeOS 102.0.4975, but this should work on just about any release of ChromeOS. On a side note, this will also work with the Chrome browser, regardless of what platform you use it on.
Open the Bookmark Manager
The first thing you must do is open the Bookmark Manager. You can do this in three different ways. The first is from within the Chrome menu:
- Open Chrome.
- Click the three-dot menu button near the upper right corner.
- Click Bookmarks > Bookmark manager.
The second method is via keyboard shortcut:
- Open Chrome.
- Hit the [Ctrl]+[Shift]+[O] keyboard shortcut.
The third method is from the Chrome address bar:
- Open Chrome.
- Type chrome://bookmarks in the address bar and hit Enter on your keyboard.
Create a new folder
What we’re going to do is create a new folder that will house entries for all of our pinned tabs. To create the new folder, click the secondary menu button (the 3-dot menu in the Bookmark Manager — not in the Chrome toolbar — seen in Figure 1).
Figure 1
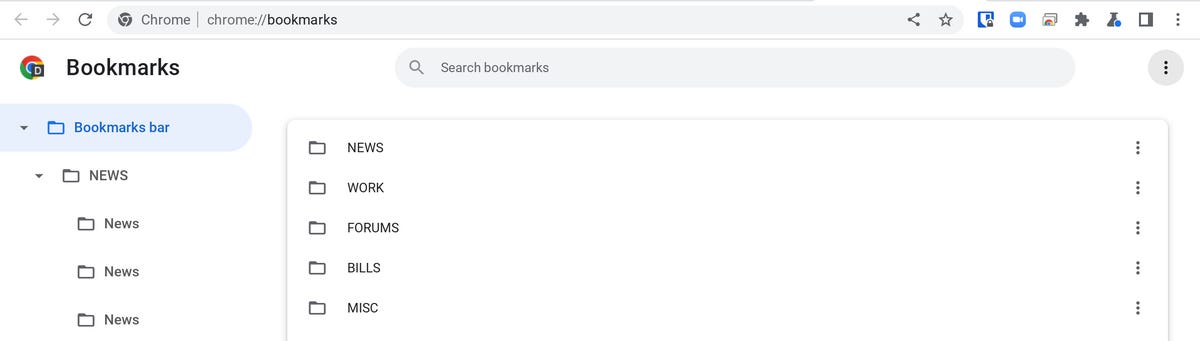
The Chrome Bookmark Manager menu is highlighted with a dark gray circle.
In the resulting menu, click Add new folder. Name the folder Pinned Tabs and click Save.
Add bookmarks to the new folder
Next, we’ll add our pinned tabs to the new folder. To do that, click on one of your pinned tabs and then click the Star icon in the address bar. In the resultant popup (Figure 2), give the bookmark a name, and then, in the Folder drop-down, make sure to select the Pinned Tabs folder.
Figure 2
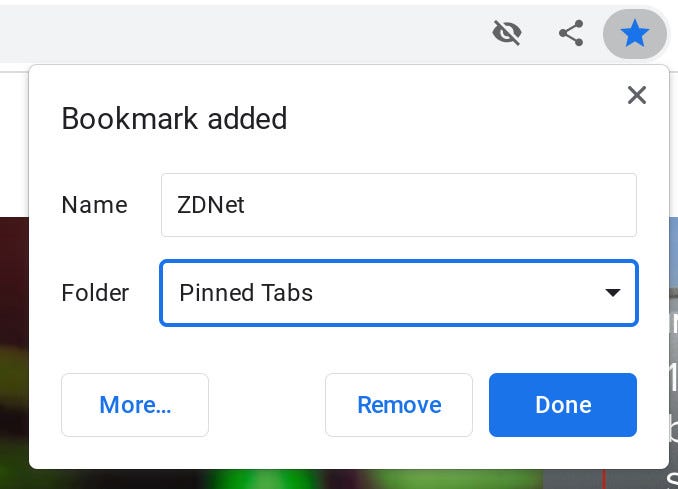
Adding ZDNet to our new Pinned tabs folder.
Click Done and the bookmark will be saved to the Pinned Tabs folder. Continue doing that until you’ve saved bookmarks for all your pinned tabs to the new Pinned Tabs folder.
Open all of your pinned tabs
Let’s say the gremlins somehow managed to get wet and are dead set on wreaking havoc. You open your Chromebook to see that, once again, those pinned tabs have vanished. What do you do?
Don’t panic.
Go back to the Chrome Bookmark Manager and locate the new Pinned Tabs folder you created. Right-click (or two-finger tap) the Pinned Tabs folder and select Open all (X) – where X is the number of bookmarks in the folder (Figure 3).
Figure 3
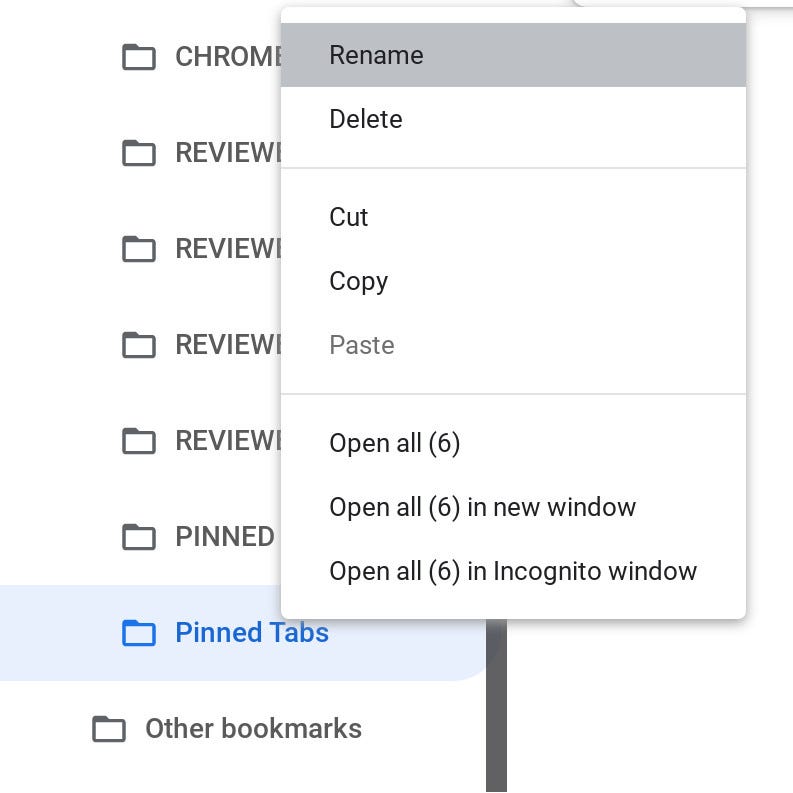
I’m about to open 6 bookmarks in the current window.
All of the bookmarks saved in Pinned Tabs will open and you can, once again, pin them to Chrome. This time around, let’s hope those gremlins give you a bit of a respite from their shenanigans and those pinned tabs remained pinned. However, if something goes askew, you can easily re-open them from the Pinned Tabs folder.
And that’s how I’ve saved my lovely wife from the headache associated with The Case of the Missing Pinned Tabs.