
This Raspberry Pi (or other SBC) cooler is better than heatsinks and fans for me
A Peltier thermoelectric cooler module Adrian Kingsley-Hughes/ZDNET
I was approached the other day for cooling advice for an SBC (single board computer) project.
Without going into unnecessary detail, the issue was that the board needed to operate in an unusually warm environment, and even with a heatsink and fan installed, the processor was running rather close to the thermal edge.
If a heatsink and fan weren’t enough to cool the board, what could be done without resorting to drastic modifications? (The board in question was a Radxa Rock 5 Model B, but the solution below would work for a Raspberry Pi too.)
Also: How to cool your Raspberry Pi (and should you?)
I remember being heavily into overclocking the processors in desktop computers, and the more you push these beyond their comfort zone, the harder they work, and the more heat it generated that needs dissipating.
One solution that I used was a Peltier thermoelectric cooler module. This works by taking advantage of the Peltier effect. In simple terms, when an electric current is passed through two dissimilar conductive materials (usually a pair of semiconductors) joined together, heat is transferred from one side to the other. This results in one side becoming cooler while the other side becomes hotter.
ZDNET RECOMMENDS
Peltier Thermoelectric Cooler Module – 5 Volt/1 Amp
- Generate a temperature differential
- 5V module
- Rated for 5W max (5V/1A)
- Maximum temperature differential: 65°C/149°F
The Peltier cooler is named after Jean Charles Athanase Peltier, a French physicist who, in 1834, discovered the thermoelectric effect that now bears his name.
It’s a weird effect — I’ll never get over how strange it is to hold something that is simultaneously both hot and cold –but it’s a great way to keep something cool. The warm side of the cooler does itself need a heatsink and fan to carry the heat away, but the Peltier thermoelectric module is a far more effective cooler than using a heatsink and fan alone.
Also: How to overclock and stress-test your Raspberry Pi
You can see this effect in the thermal image below, although thermal cameras aren’t accurate because of the emissivity (i.e., reflectiveness) of the ceramic surface of the Peltier module.
Thermal image of both sides of an active Peltier module Adrian Kingsley-Hughes/ZDNET
I used these to great effect with overclocked processors, and wondered if I could jerry-rig something to work here.
Also: Finding Raspberry Pi: Where to buy the latest model and its alternatives
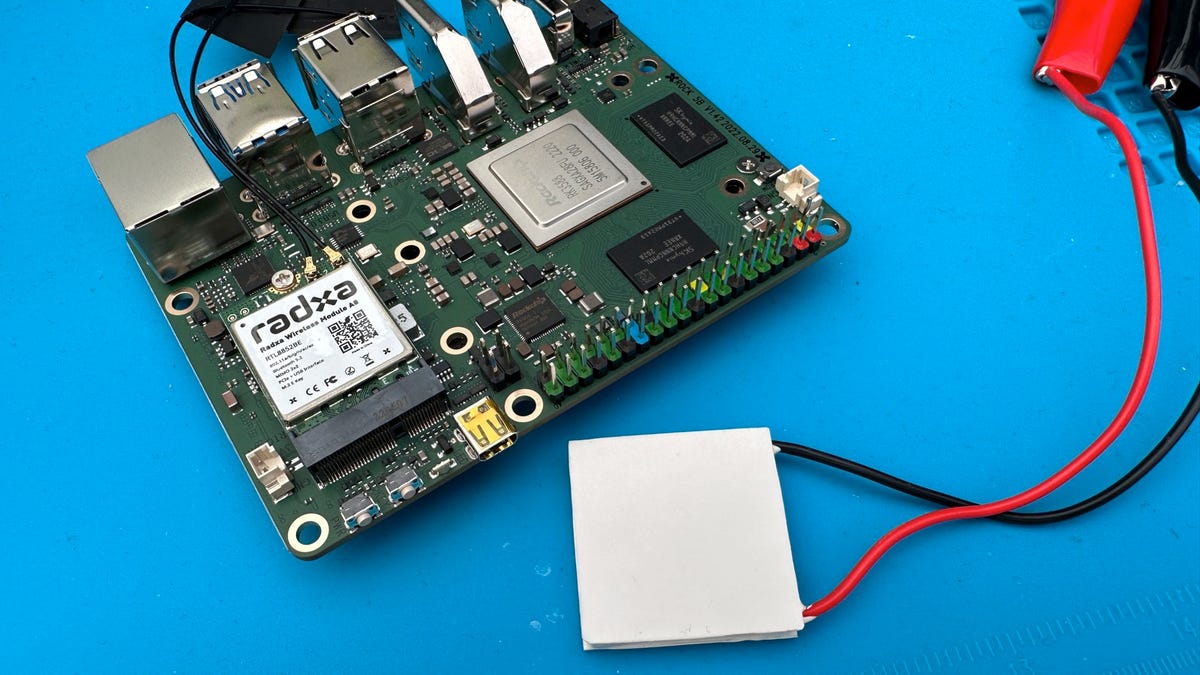
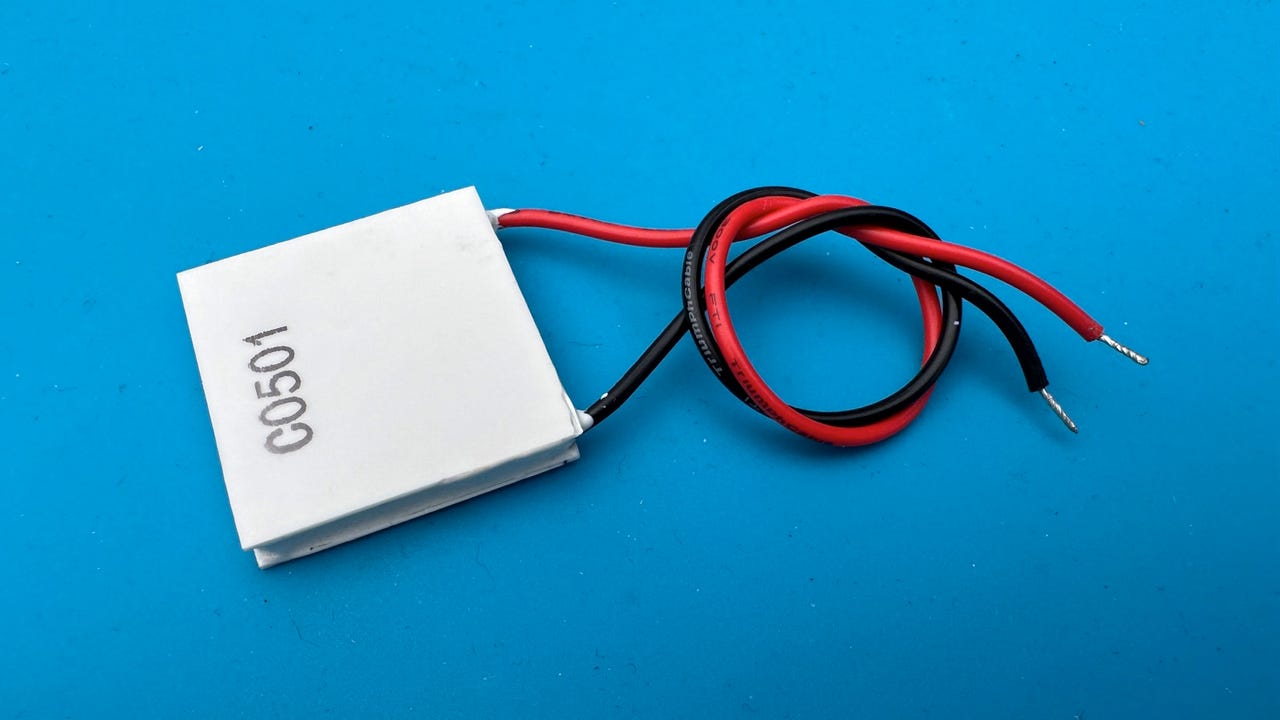
Peltier modules come in all sorts of sizes and ratings. The one I used was a modest 30 x 30 mm that runs on 5V/1A (although the module will happily run at 3V in my tests), which means I could run it (and the fan) off a small power supply. There are bigger Peltier modules out there, but they’d be overkill for this sort of cooling project.
Peltier module and a Radxa Rock 5 Model 5 single-board computer. Adrian Kingsley-Hughes/ZDNET
Here’s what you need;
The thermal paste needs to be applied both between the cold side of the Peltier module and the chip you’re trying to cool, and between the hot side of the module and the heatsink. The paste helps improve the heat transfer between the air gaps that would otherwise exist on either side of the module.
Dab of thermal paste on the Peltier module Adrian Kingsley-Hughes/ZDNET
The cooler fan I had for the Rock 5 Model 5 had fittings that could attach to the board. (I needed to use longer fasteners.) For a Raspberry Pi, I’d sandwich the Peltier between a dedicated Raspberry Pi cooler.
Also: The best cooler for Raspberry Pi power users
The main thing to remember when assembling a project like this is that the cold side of the Peltier goes onto what you are cooling. Don’t get this wrong! Sometimes they are marked, but if not, you’ll have to power up your module so you can feel the difference.